无论你想走多远,你都需要不断地走下去。前端最精华的便是原生的js,这也是我们前端工程师的技术分层的重要指标,也提现这你的代码能力,开发的水平。废话不多说,进入今天的主要分享————基于面向对象思想的图片轮播。其效果如下所示:
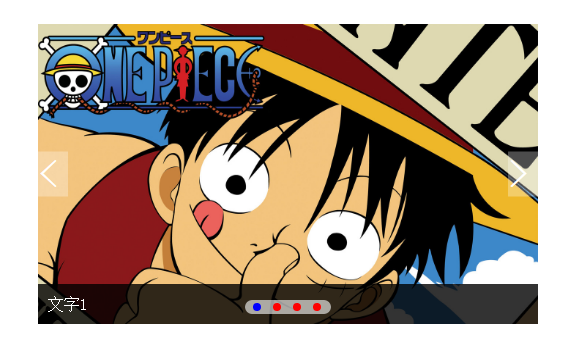
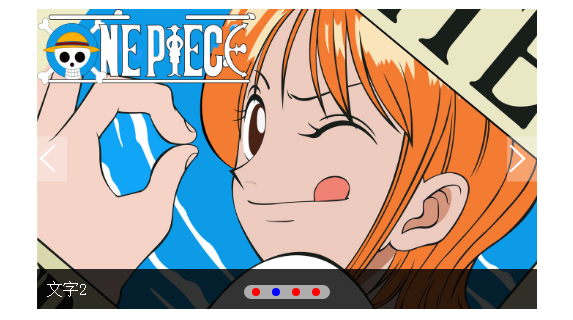
正如图片所示这样我们要实现的效果,这里与我们以往不同的是我们的布局十分简洁。其中html布局如下:
 1 <!DOCTYPE html>
 2 <html lang="en">
 3 <head>
 4     <meta charset="UTF-8">
 5     <title>Document</title>
 6     <link rel="stylesheet" href="index.css">
 7     <script src="tools.js"></script>
 8     <script src="js.js"></script>
 9 </head>
10 <body>
11     <div class="container" id="slide1">
12         <ul>
13             <li><a href=""><img src="images/1.jpg" alt="文字1"></a></li>
14             <li><a href=""><img src="images/2.jpg" alt="文字2"></a></li>
15             <li><a href=""><img src="images/3.jpg" alt="文字3"></a></li>
16             <li><a href=""><img src="images/4.jpg" alt="文字4"></a></li>
17         </ul>
18     </div>
19     <script>
20         var s = new Slider("slide1");
21         console.info(s);
22     </script>
23 </body>
24 </html>
样式文件index.css
 1 ul,ol,li{padding:0;margin:0;list-style: none;}
 2 .container{
 3     width: 500px;
 4     height: 300px;
 5     margin:50px auto;
 6     position: relative;
 7 }
 8 #msg{
 9     width:100%;
10     height:40px;
11     line-height: 40px;
12     text-indent:10px;
13     position:absolute;
14     bottom:0px;
15     left:0;
16     color:white;
17     font-size: 16px;
18     background:rgba(0,0,0,.8);
19     cursor:pointer;
20     z-index:1;
21 }
22 ul li a{display: block;}
23 img{width: 500px;height: 300px;}
24 ol{position: absolute;bottom:10px; left:50%; -webkit-transform:translateX(-50%); background:rgba(255,255,255,.6);border-radius:7px;padding:3px;z-index:2;}
25 ol li{background: red; float:left; width:8px; height:8px;margin-left:5px; -webkit-border-radius:4px;-mz-border-radius:4px;margin-right: 7px}
26 span{
27     width:30px;
28     height:45px;
29     line-height: 45px;
30     font-size:40px;
31     color:white;
32     background:rgba(255,255,255,.3);
33     cursor:pointer;
34     position:absolute;
35     font-weight: bold;
36     top:50%;
37     left:0;
38     -webkit-transform:translateY(-50%);
39     -mz-transform:translateY(-50%);
40     -webkit-transition:all 1s ease 0s;
41 }
42 #rtBtn{
43      right:0;
44      left:auto;
45 }
46 span:hover{
47     -webkit-transform:rotateY(40deg) translateX(-30px) scale(1.2);
48 }
注意这里的浏览器兼容,我这里只兼容了内核为-webkit-的;同时注意这里的ol和div的样式设计。
js.js代码:
1 function Slider(containerId){ 2 this.containerId = $(containerId); 3 this.ullis =$get($get(containerId,"ul")[0],"li"); 4 this.num = this.ullis.length; 5 this.ollis =this.createList(); 6 this.indexA = 1; 7 this.timer; 8 this.init(this.indexA); 9 this.ltBtn = $("ltBtn"); 10 this.rtBtn = $("rtBtn"); 11 this.mouseenter(); 12 this.autoplay(this.indexA); 13 console.info(this.ollis); 14 } 15 Slider.prototype.createList =function(){//创建ol 16 var ol = $create("ol"); 17 var lis = []; 18 for(var i = 0; i<this.num;i++){ 19 var li = $create("li"); 20 ol.appendChild(li); 21 lis.push(li); 22 } 23 this.containerId.appendChild(ol); 24 var spanleft = $create("span") 25 spanleft.innerHTML="<" 26 spanleft.id="ltBtn"; 27 this.containerId.appendChild(spanleft); 28 var spanright =$create("span"); 29 spanright.innerHTML = ">" 30 spanright.id = "rtBtn"; 31 this.containerId.appendChild(spanright); 32 var div = $create("div") 33 div.id= "msg"; 34 this.containerId.appendChild(div); 35 return lis; 36 } 37 Slider.prototype.init =function(index){ 38 this.moveto(index); 39 } 40 Slider.prototype.mouseenter =function(){ 41 var that = this; 42 for (var i = 0; i < this.num; i++) { 43 this.ollis[i].index = i; 44 this.ollis[i].onmouseenter = function(){ 45 that.moveto(this.index); 46 } 47 } 48 this.ltBtn.onclick = function(){ 49 if(that.indexA>0){ 50 that.indexA--; 51 that.moveto(that.indexA); 52 }else{ 53 that.indexA=that.num-1; 54 that.moveto(that.indexA); 55 } 56 } 57 this.rtBtn.onclick = function(){ 58 if(that.indexA<that.num-1){ 59 that.indexA++; 60 that.moveto(that.indexA); 61 }else{ 62 that.indexA = 0; 63 that.moveto(that.indexA); 64 } 65 } 66 } 67 Slider.prototype.moveto =function(index){ 68 for (var i = 0; i < this.num; i++) { 69 this.ullis[i].style.display="none"; 70 this.ollis[i].style.backgroundColor="red"; 71 } 72 this.ullis[index].style.display="block"; 73 this.ollis[index].style.backgroundColor="blue"; 74 $("msg").innerHTML = this.ullis[index].firstChild.firstChild.alt; 75 } 76 Slider.prototype.autoplay= function(indexA){ 77 var that =this; 78 79 that.timer = setInterval(function(){ 80 indexA%=that.num; 81 that.moveto(indexA); 82 indexA++; 83 },3000); 84 that.containerId.onmouseenter =function(){ 85 clearInterval(that.timer); 86 console.info(that.containerId); 87 } 88 that.containerId.onmouseleave = function(){ 89 that.autoplay(indexA) 90 } 91 92 }
简单讲一下:此次开发的大致思想,首先我们在html中首先生成一个对象构造器——即Slider,这样的好处是,我们以后可以很方便地通过我们的构造器来实现一个图片轮播的效果,减少代码冗余,同时减少了变量命名的冲突;当然它也有弊端,对于小型项目不是很好,所以在开发工程需要考虑。
此次开发中,我们需要首先实现:html架构和简单的样式操作,这里我们只需要下次添加我们需要的图片轮播的图片资源和整个容器div就可以了,减少了对应的轮播导航下标的编写,提现了代码的简单性,更适合小白类开发的编写。
这里遇到的问题有:
1.如何创建一个元素,如何给创建的元素添加到需要的父亲结点上
2.如何给生成的标签添加类名,以及属性
解决办法
1.利用 var li =document.creatElement("li")来创建新的属性标签,即dom操作。
创建dom元素(createElement()创建元素,createTextNode()创建文本结点)并且添加 appendChild()示例如下:
<div id="div1">
<p id="p1">This is a paragraph.</p>
<p id="p2">This is another paragraph.</p>
</div>

<script>
var para=document.createElement("p");
var node=document.createTextNode("This is new.");
para.appendChild(node);

var element=document.getElementById("div1");
element.appendChild(para);
</script>
2.属性的操作和修改:
这里对于创建的元素的类名和id进行演示
<!DOCTYPE html>
<html lang="en">
<header>
<meta charset ="utf-8">
<style>
.cur{
color:red;
}
</style>
<title>创建元素</title>
</header>
<body>
<ul id="content">
</ul>
<script>
var  li = document.createElement("li");
li.classList.value = "cur";
li.innerHTML = "今天我学习面向对象开发思想";
document.getElementById("content").appendChild(li);
</script>
</body>
</html>
效果图:

前端开发中的样式设计:一般思路首先对于大型网站的开发,我们需要统一设计初始化样式,一般文件名是:base.css,其中是我们对于所有浏览器统一使用的一个文件类型,其中设计代码如下:
 1 @charset "utf-8";
 2
 3 /* CSS reset */
 4 body,div,dl,dt,dd,ul,ol,li,h1,h2,h3,h4,h5,h6,pre,form,fieldset,input,textarea,p,blockquote,th,td{margin:0;padding:0;}
 5 table{border-collapse:collapse;border-spacing:0;}
 6 fieldset,img {border:0;}
 7 img{vertical-align: top;}
 8 address,caption,cite,code,dfn,em,strong,th,var{font-style:normal;font-weight:normal;}
 9 ol,ul {list-style:none;}
10 capation,th{text-align:left;}
11 h1,h2,h3,h4,h5,h6{font-size:100%;font-weight:normal;}
12 q:before, q:after{content:'';}
13 abbr,acronym{border:0;}
14
15 .tl{text-align:left;}
16 .tc{text-align:center;}
17 .tr{text-align:right;}
18 .bc{margin-left:auto;margin-right:auto;}   /*块状元素集中对齐 block center*/
19 .fl{float:left;display:inline;}  /* 可修复IE6中双倍边距bug */
20 .fr{float:right;display:inline;}
21 .cb{clear:both;}
22 .overflow-h{overflow:hidden;}
23
24 .clearfix:after{
25     content:'';
26     display:block;
27     height:0;
28     visibility: hidden;
29     clear:both;
30 }
31 .clearfix{    /*IE6中的解决方案*/
32     zoom:1;
33 }
注意这里我添加了一个新的类,通过伪对象的方法来解决浮动造成的塌陷问题,常用的解决浮动塌陷的方法是
1.给使用float元素的父类结束前添加一个高为0,宽为0并且有clear:both样式的div;
2.在使用float元素的父类元素添加overflow:hidden
3.使用after伪对象清除浮动,如上面的代码显示。
在项目开发中样式设计过程中,我们不会去修改其他工程师已经编写的样式,而是在他们的基础上,我们添加新的样式,来覆盖他们的样式;这样的好处,可以避免修改样式而毁坏原来的样式,而影响到项目的开发。我们常用的开发的插件,如在手机端开发常用的图片轮播插件的样式设计,我们也是在后面修改的。
一般我们会把通用的一些样式写在一个新的css文件中,提供给大家使用,把一些对应的的样式写在index.css文件中。注意这里使用了css3中新增的属性:transfrom,border-radius,rotate(),rgba()来实现背景色变化,在IE浏览器中不兼容,需要写成background:rgb(255,255,255);filter(alpha(opacity=60));今天就大致说到这里吧。
js.js文件
注意这里不是光引用这个文件就可以了,而是在html中通过var s = new Slider("id");来调用我们编写的构造器。注意在编写程序的时候,不要一开始写完了js构造器所有的代码在去调用,因为这样不方便检查我们的编写是否出现了出现了错误,这里推荐下错误检查方法:一般都老鸟都会通过console.info()或者console.log()来答应我们的变量或者传递的参数,还以可以通过打印一个变量来检测我们的代码是否执行,是否有效,常见的错误类型有语法错误,引用类型错误,逻辑错误等,所以要注意错误类型并且及时修改。
工具文件,我们可以把我们常用的方法封装成一个函数,通过传递形参的形式来获得我们需要的元素和效果,如下面所示的tools.js
function $(id){
    return document.getElementById(id);
}
function $get(containerId,tagName){
    if(typeof containerId =="string" && $(containerId)){
        return $(containerId).getElementsByTagName(tagName);
    }
    else if(typeof containerId=="object")
    {
        return containerId.getElementsByTagName(tagName);
    }
    else{
        throw ("你写的第一个参数不是一个ID");
    }
}
function $create(TagName,attr){
    var dom = document.createElement(TagName);
    for(var p in attr){
        dom[p] = attr[p];
    }
    return dom;
}
最后我们分析一下构造器中需要的属性:
1.创建对应的ol导航和对应的按钮
2.初始化所有的样式操作
3.显示在对应的容器操作
4.鼠标进入事件
5.自动播放事件
在这些基本的事件中我们需要注意调用的顺序,如:创建肯定在初始化之前。我们可以把一些通用的属性放在原型链中来编写,这样的好处减少了变量空间占用和多次访问属性的效果。
遇到的问题:
1.其中的this指代问题:这里的解决办法是在鼠标进入之前的函数中缓存一下var that = this。 这样就可以访问属性了。
2.图片轮播判断:向左点击的时候, 如果当前的索引值大于零,让它执行自减操作,如果不大于0 就让他等于对应图片长度-1;
向右点击的时候,当前的索引值小于它对应的轮播图片的长度-1,执行自加1操作,超过图片轮播长度时,索引值等于0,代码如下所示
this.ltBtn.onclick = function(){
        if(that.indexA>0){
            that.indexA--;
            that.moveto(that.indexA);
        }else{
            that.indexA=that.num-1;
            that.moveto(that.indexA);
        }
    }
    this.rtBtn.onclick = function(){
        if(that.indexA<that.num-1){
            that.indexA++;
            that.moveto(that.indexA);
        }else{
            that.indexA = 0;
            that.moveto(that.indexA);
        }
    }