搞了3天终于把Django成功部署到Ubuntu,记录一下;
引用来自泡泡茶壶:
Ubuntu下的Nginx + Uwsgi + Django项目部署详细流程
前提说明:
Django作为小程序的后端,因小程序的请求到后端的都是https请求,所以Django必须支持https请求
写在前面:
部署Django项目前,先用Django自带服务器运行一下看有没有问题,再部署;否则可能项目本身有问题,却以为是部署不正确导致的
运行命令:python manage.py runserver .....
各种配置:
1、nginx支持https请求
1)项目对象的nginx.conf配置
# the upstream component nginx needs to connect to
upstream django {
    # unix:///home/breavo/PyWorkSpace/mysite_code_shuffle/config/eshop.sock
    server xx.xx.xx.xx:8002; # xx.xx.xx.xx是服务器的ip,若是腾讯云服务器,则是服务器外部ip,这里的ip和端口是和uwsgi通信的方式,所以和uwsgi.ini配置文件中一致
}


# configuration of the server
server {
    # the port your site will be served on
    listen 90 ssl; # 监听端口可以是任何端口,但不要和已使用端口冲突
    # listen 8003;
    # the domain name it will serve for
    server_name  indoor.crazymonkey.ml; # 这里可以是域名也可以是本机ip,同上面的xx.xx.xx.xx
    charset     utf-8;

    # max upload size
    client_max_body_size 75M;   # adjust to taste

    # ssl configuration
    ssl on; # 打开了ssl验证,支持https请求
    ssl_certificate /root/hewenjuan/Indoor_Localization/2446810_www.preciselocation.top.pem; # ssl证书放的位置
    ssl_certificate_key /root/hewenjuan/Indoor_Localization/2446810_www.preciselocation.top.key; # 使用绝对路径肯定没错啦

    # Django media
    location /media  {
        alias /root/hewenjuan/Indoor_Localization/media; # your Django project's media files - amend as required,有图片等,
    }

    location /static {
        # alias /path/to/your/mysite/static; # your Django project's static files - amend as required
        alias /root/hewenjuan/Indoor_Localization/static; # 静态文件位置,Django项目admin静态文件
    }

    # Finally, send all non-media requests to the Django server.
    location / {
        uwsgi_pass  django; # 这个就是引用了上面的upstream django配置了
        # include     /home/breavo/PyWorkSpace/mysite_code_shuffle/config/uwsgi_params; # the uwsgi_params file you installed
        include /etc/nginx/uwsgi_params;
    }
}
说明:用nginx -t命令查看上面nginx文件的正确性
2)项目对应的uwsgi.ini配置
# mysite_uwsgi.ini file
[uwsgi]
socket =  xx.xx.xx.xx:8002 # 腾讯云内部ip,端口和nginx.conf配置的Django部分相同
# Django-related settings
# the base directory (full path)
chdir           = /root/hewenjuan/Indoor_Localization  # Django项目所在目录
# Django's wsgi file
module          = Indoor_Localization.wsgi #
# module =  config/hello.py:application
wsgi_file = Indoor_Localization/wsgi.py # Django项目wsgi.py所在位置,相对于上面的chdir目录
# wsgi_file =  /root/hewenjuan/Indoor_Localization/config/hello.py:application
# the virtualenv (full path)
virtualenv = /root/.pyenv/versions/indoorLocation/bin/python3.6  # python虚拟环境绝对位置
# home            = /root/.pyenv
home            = /root/.pyenv/versions/indoorLocation

# process-related settings
# master
master          = true
# maximum number of worker processes
processes       = 10
# the socket (use the full path to be safe
# socket          = /root/hewenjuan/Indoor_Localization/Indoor_Localization.sock
# ... with appropriate permissions - may be needed
chmod-socket    = 666
# clear environment on exit
vacuum          = true

stats           = %(chdir)/config/uwsgi.status

pidfile         = %(chdir)/config/uwsgi.pid
# daemonize = %(chdir)/config/uwsgi.log # 开启该字段,uwsgi会在后台运行,日志保存在该文件中,若没有开启该字段,则在前台运行,日志显示在界面上(调试用方便)
# pidfile = %(chdir)/config/uwsgi.pid
#plugins =  /root/.pyenv/versions/indoorLocation/bin/python3.6
3)每次修改了Django项目文件代码,都需要重启uwsgi和nginx,所以自己写了个启动文件start.sh
killall -9 uwsgi  # 关闭所有uwsgi进程,有时候没有关掉上次的uwsgi进程,启动新的会报错等问题
killall -9 uwsgi  # 额,有时候关闭一次会出现没关掉的情况
uwsgi --ini mysite_uwsgi.ini # 启动mysite_uwsgi.ini文件,即启动uwsgi进程
/etc/init.d/nginx restart # 重启nginx进程
说明:启动start.sh命令:sh start.sh
2、uwsgi支持https请求
1)uwsgi.ini配置
# mysite_uwsgi.ini file
[uwsgi]
# 2446810_www.preciselocation.top.pem,2446810_www.preciselocation.top.key是ssl证书
https = xx.xx.xx.xx:443,2446810_www.preciselocation.top.pem,2446810_www.preciselocation.top.key # xx.xx.xx.xx是腾讯云内部ip
# Django-related settings
# the base directory (full path)
chdir           = /root/hewenjuan/Indoor_Localization
# Django's wsgi file
module          = Indoor_Localization.wsgi
# module =  config/hello.py:application
wsgi_file = Indoor_Localization/wsgi.py
# wsgi_file =  /root/hewenjuan/Indoor_Localization/config/hello.py:application
# the virtualenv (full path)
virtualenv = /root/.pyenv/versions/indoorLocation/bin/python3.6
# home            = /root/.pyenv
home            = /root/.pyenv/versions/indoorLocation

# process-related settings
# master
master          = true
# maximum number of worker processes
processes       = 10
# the socket (use the full path to be safe
# socket          = /root/hewenjuan/Indoor_Localization/Indoor_Localization.sock
# ... with appropriate permissions - may be needed
chmod-socket    = 666
# clear environment on exit
vacuum          = true

stats           = %(chdir)/config/uwsgi.status

pidfile         = %(chdir)/config/uwsgi.pid
# daemonize = %(chdir)/config/uwsgi.log
# pidfile = %(chdir)/config/uwsgi.pid
#plugins =  /root/.pyenv/versions/indoorLocation/bin/python3.6
遇到的问题:
1、每次退出账号重新登录都会提示,pyenv 不存在了

原因:
方法:命令行输入:source ~/.bashrc;即执行.bashrc文件中的语句(包含 了pyenv初始化语句)
2、nginx权限问题:django admin后台样式不显示,查看nginx错误日志(位置:/var/log/nginx/error.log),显示权限拒绝Permission denied
原因:Django项目下的static文件执行权限不够
方法:打开文件/etc/nginx/nginx.conf,修改 user www-data为user root(root:你目前登录的账号名称,也可能是Ubuntu等其他)
参考qingspace:https://www.cnblogs.com/qingspace/p/6838747.html
3、unavailable modifier requested

原因:没有激活python虚拟环境
方法:输入命令:pyenv activate xx,激活xx环境,xx是你项目所在的python虚拟环境
4、安装项目依赖包:pip install -r requirements.txt,遇到一个问题:安装不成功,界面没有显示不成功
出现下面显示的Successfully ...才表示安装成功
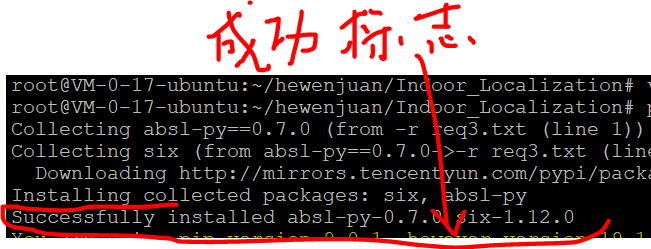
原因:requirements.txt文件中有win_xx的安装包,即有python接入window系统所使用的安装包,类似了win32等,啥除掉即可;
因为有可能写代码使用的是window系统,部署的时候放在了Linux系统
解决方法:删除win32等针对window系统的安装包